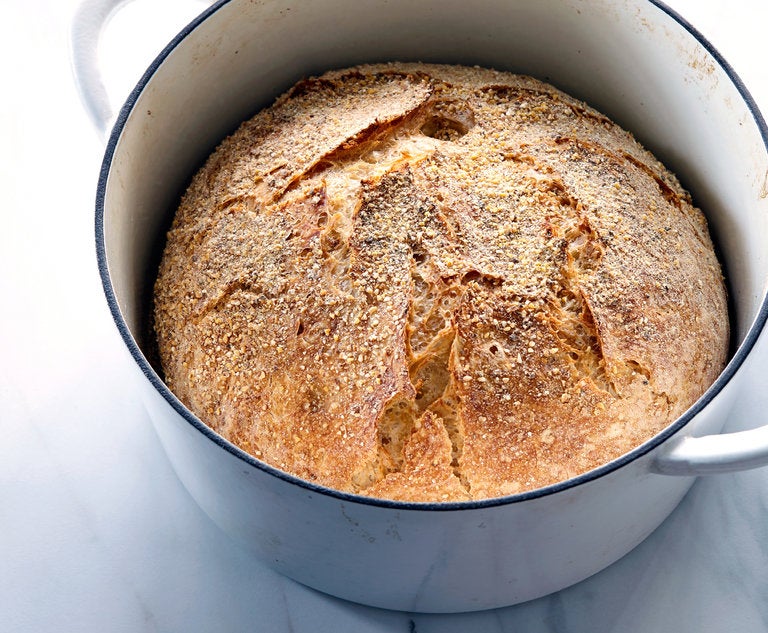
How to Make No Knead Bread
The World’s Most Famous Bread Recipe for Perfect Delicious Homemade Bread
Here is one of the most popular recipes The Times has ever published, courtesy of Jim Lahey, owner of Sullivan Street Bakery. It requires no kneading. It uses no special ingredients, equipment or techniques. And it takes very little effort — only time. You will need 24 hours to create the bread, but much of this is unattended waiting, a slow fermentation of the dough that results in a perfect loaf. (We’ve updated the recipe to reflect changes Mark Bittman made to the recipe in 2006 after publishing and receiving reader feedback. The original recipe called for 3 cups flour; we’ve adjusted it to call for 3⅓ cups/430 grams flour.) In 2021, J. Kenji López-Alt revisited the recipe and shared his own tweaked version. —Mark Bittman
Ingredients:
- 3⅓cups/430 grams – all-purpose or bread flour, plus more for dusting
- 390g water (1.5c + 2tbs)
- Generous ¼ teaspoon/1 gram instant yeast
- 2 teaspoons/12 grams kosher salt
- Cornmeal or wheat bran, as needed
Quick rundown of method:
– Mix everything together until there is no more visible flour
– Cover with a damp towel or plastic wrap.
– Ferment at room temperature for 12-18+hours (this loaf was 16hr)
– After the time, wet your hands and stretch and fold in all the sides.
– Move to parchment paper, seam side down. (this makes putting the bread in easier)
– Proof for 2 hours (i use the same bowl to cover it) – Preheat your oven with your cast iron or dutch oven for 1 hour (450F)
– Dust the of your loaf with a little flour and cut straight down the middle.
– You can use a scissor for this part too. This lets the steam escape in a controlled manner.
– Transfer your bread into your pan carefully.
– Bake Covered for 30 minutes.
– Take the lid off and bake uncovered for 25-30minutes more.
– Let it cool on a wire rack. Boom Bbby!!!! Nice job!!
STEP BY STEP
-
Step 1
In a large bowl combine flour, yeast and salt. Add 1½ cups/345 grams water and stir until blended; dough will be shaggy and sticky. Cover bowl with plastic wrap. Let dough rest at least 12 hours, preferably about 18, at warm room temperature, about 70 degrees.
-
Step 2
Dough is ready when its surface is dotted with bubbles. Lightly flour a work surface and place dough on it; sprinkle it with a little more flour and fold it over on itself once or twice. Cover loosely with plastic wrap and let rest about 15 minutes.
-
Step 3
Using just enough flour to keep dough from sticking to work surface or to your fingers, gently and quickly shape dough into a ball. Generously coat a cotton towel (not terry cloth) with flour, wheat bran or cornmeal; put dough seam side down on towel and dust with more flour, bran or cornmeal. Cover with another cotton towel and let rise for about 2 hours. When it is ready, dough will be more than double in size and will not readily spring back when poked with a finger.
alt method: Where you use towels to hold the dough, I use parchment paper…then I grab the paper, lower it into the 450 degree pot put on the lid, and bake it. No sticking. No burning. -
Step 4
At least a half-hour before dough is ready, heat oven to 450 degrees. Put a 6- to 8-quart heavy covered pot (cast iron, enamel, Pyrex or ceramic) in oven as it heats. When dough is ready, carefully remove pot from oven. Slide your hand under towel and turn dough over into pot, seam side up; it may look like a mess, but that is OK. Shake pan once or twice if dough is unevenly distributed; it will straighten out as it bakes. Cover with lid and bake 30 minutes, then remove lid and bake another 15 to 30 minutes, until loaf is beautifully browned. Cool on a rack.
Use high gluten (bread flour) for best results and that chewy crumb!
The key to the crust is to bake it longer than you think. Your oven is going to be dark so the bread will look darker than it actually is. I usually go the full 30minutes.
For a funky sour flavor, let your dough cold ferment in the fridge for 3+ days. (after the initial 12-18hrs). The wait is worth it!!

